It’s time to get back into this whole writting thing..

Ok nerdlings, I know you’ve been wondering what that emptiness you’ve been feeling lately is, and I think I have it figured out…it’s me, duh…I know i’ve been major awol lately (a grand total of 2 posts in all of 2015!), but to be honest with you…

i miss you

..so let’s get back into this whole thing, mmmkay? Great..

ok…so where do we start? how about an ice breaker post, like on something we can all admit we love…

coffee morning illustrated caffeine

(secretly I’ve been spending the whole year searching for the appropiate gifs to attach, and I think it’s obvious that I..

the office nbc office andy nailed it…)

 – hey nossi! way to still be weird!! we barely even noticed you were gone!!

aww, you guys

stop ben stiller zoolander bashful derek zoolander

ok, i’m done…moving right along

So as I’m sure you remember we’ve already covered coffee … twice…but to recap for the sake of, whatever the opposite of brevity is, the coffee that we’ve all come to love is a “bean” that’s more like the seed found in a cherry-like fruit. The bean is then dried, fermented, roasted, ground, and brewed. There are so many variables that can affect the final product, that it can get confusing, so let’s go over the stuff that actually you have control over.

1) The beans – As with any food, quality deteriorates over time, and obviously the fresher and better the bean, the better the coffee (there’s actually a caveat to that statement…coffee beans are actually not at it’s best right after it’s roasted, and that’s because after roasting there’s a lot of gases [carbon dioxide being the most abundant] that still needs time to dissipate out, and if brewed right away can give an off flavor..)… So its always best to buy whole beans, and grind yourself (more on that in a second).

What kind of bean you get, I feel like, is where it can get mostly unnecessarily confusing. Roast of said bean aside, (which we’ll also get to shortly, Dr Impatientpants, geez…), there’s the actual type of bean. For example kona bean or blue mountain, or Ethiopian yagachurra are all names of famous beans known for distinct qualities (ok, I made up that last one), and sure they might be great and all, but I’m inclined to opine that the subtle nuances that differentiate between one bean and the next are of lesser importance than freshness, roast, and brew method. That’s not to say they’re not important, but it’s not the most important thing to look for. Also a lot of times they sell these high quality beans as part of a “blend,” and there’s no way to tell what percentage is high quality bean, and what is some other random bean. That’s not to say all blends are bad, but make sure it’s from a reputable roaster.

2) The roast – in order to get the dark color which is characteristic of coffee, can we please have Monsieur Maillard come back from his long hiatus? Don’t know what/who I’m talking about? Well its time you open your eyes bruhhh, and maybe read like one other post on this here fine establishment.. (Maillard = browning {which is not the same as caramelization}..which we’re not going to get into here..)…but how long you roast it will make a difference for coffee beans. To keep this brief – light roasts are obviously roasted the least amount of time, and will allow you to taste more of the coffee notes that are unique to the individual bean. Dark roasts (also known as Italian/french/vienna/espresso roasts) are as dark and shiny as they come, and will have mainly roasted-y flavor, and very little flavor of the character of the coffee, and are great for espressos. Medium roasts try to toe the line between the two.
The roast type you want is mainly whatever your preference is. Personally I used to love medium roasts, because I’ve felt that light roasts didn’t give me enough in the way of oomph/flavor, and dark roasts were too much. But nowadays I lean towards lighter roasts (partly because of the newer way I’ve been brewing, namely an aeropress, which if moshiach doesn’t come before I’m done this “short” diatribe, I might get around to talking about!).

3) the grind – there’s two ways of grinding your beans, the wrong way and the right way. The wrong way is to put it in a “spice grinder,” which similar to a food processor has a whirring blade on the bottom of some sort of bowl, and chops up the coffee bean into random sized chunks. The issue with this method is the non-uniformity in the grind size, which since we’re doing some sort of extraction of flavor, the variables that effect that are mainly: time, temperature, and surface area. The surface area of the coffee is dependent on the size of the grind, and if when grinding the coffee the beans are not uniform in size, then some beans will be under-brewed, and some over-brewed. However, if you were to use a burr grinder, which is essentially two inverted cones on top of each other, it dictates exactly how large the grind size will be. Which brings us to the last point –

4) the brew method – as Harold McGee says in On Food and Cookin there’s no one way that will brew the perfect cup of coffee. Each different method has it’s pros and cons taking into account different variables. Like for example – a French press allows you to take advantage of the amount of brew time, and obviously the temperature, but grind size is a little tricky. A pour over (like a Chemex) can help with the grind size problem, but time will be harder to control.

Then there’s the Aeropress. The aeropress is basically a combination of a pour over and a French press, and it kinda looks like a very large syringe with a filter attached to it’s end. The nice thing that I’ve found is it allows you to control all of the things we’ve talked about. There are really two ways of brewing with an aeropress, the regular way, and the upside down way. Here’s a step-by-step rundown on how I do things in my backwards world.

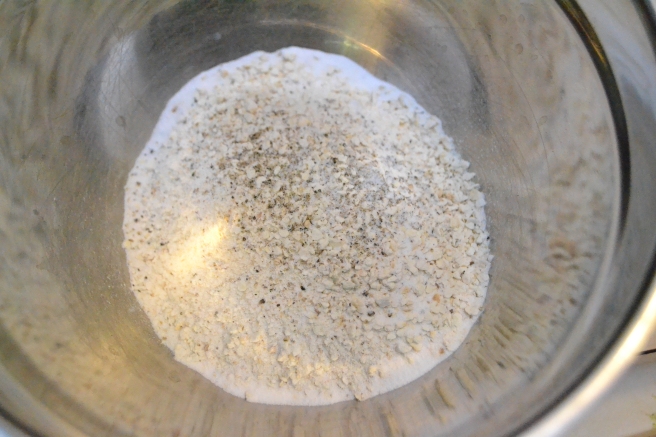
I like to start my aeropress upside down, with the plunger on the bottom. I add my coffee (obviously i weigh my coffee and weigh my water…there’s absolutely no other way of having consistently good coffee every day without doing that, and I’ll range from a 15:1 water:coffee ratio [for lighter roasts] all the way up to a 22:1 [for medium roasts).  wpid-wp-1447724767602.jpg
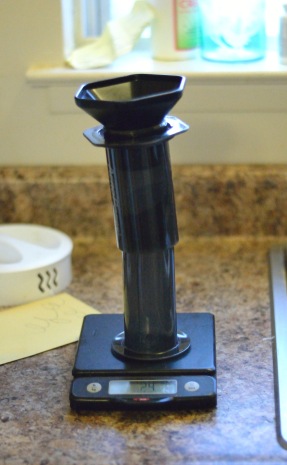
The next step is what’s called blooming the coffee ground, and that simply means adding enough hot water to just moisten the grind by adding about double the amount of water than grind (so in our example, 48 grams), and letting it sit for about 30 seconds. This starts to pull out the remaining trapped gasses in the beans.

wpid-wp-1447724766632.jpg

Once that’s done, fill the rest of the aeropress with water*, and let it seep. I usually seep the grind for around 4 minutes (but again, since time is one of the determining factors, upping or downing [??] the amount of time will affect the end results).

*can we pause for a second and talk about water temperature?? So you know how temperature is one of the factors that affect the overall extraction? Well coffee needs to be brewed no more than 190-200 degrees because it will extract too many harsh flavors; Water boils at 212 degrees, so basically water that’s just boiled is not what you want. What I do is boil water and let is sit for about 15 minutes, or if I’m in a hurry, I take a page out of Sh’miras Shabbos K’Hilchasa, and use a k’li sheni [ie – I pour the really hot water into another cup, wait about a minute, and use that water]. Along those lines, we’ve done cold brewed coffee [which again, lower temperature, means longer brew time], and I’ve even attempted “warm brewed coffee” where I brew the coffee in a sous vide machine at about 100 for a few hours…the coffee was similar to cold brewed, with a little more oomph….

wpid-wp-1447724768310.jpg

Then, I’ll put the paper filter on the filter doo-hickey, and screw it on; Turn it right side up, and press the plunger down, gently…it should take about 1-2 minutes to express all that beautiful brown elixir.

wpid-wp-1447724768651.jpg

Once that’s done, then you top off the brew with hot water to come to your total. So in our example, we have 24 grams of coffee grind, if we’re going to go with a 15:1 ratio, we’re going to need 360 grams of water, but the aeropress can only hold about 250 grams of water, so I add the additional water after (in this example, the additional 90 grams). Now you might be thinking, but won’t that dilute the coffee down? The answer my friend is, no. So for once in your life, just please trust me.

wpid-wp-1447724767701.jpg

Now you can brew it the normal way, where you put the filter on first, put the coffee grind, pour your water, and then attach the plunger and push the brew out (and top of with water)

img_20160113_072217.jpg
Hard to tell, but this is the other brew method, where the plunger goes in last

So yeah, that’s what I’ve been up to, pretty boring right? Sooo…yeah, this was fun…maybe, um, we can do this again sometime soon?? I’ll call the shadchan.

Shlissel Challah – The key to key challah

“And the Lord said onto Moses. Hearken, O Moses for ye shall take for yourself bread which hath been leavened, and a key shall be placed upon it…”

– Levitironomy 12:43

“R’ Akiva said in the name of the Rabbis, When the verse states “a key shall be placed upon it” the verse means the challah should be in the shape of a key. R’ Meir said: in Pumpadeesah I once saw a man place a key inside of a regular bread, and said that he was placing a key upon it, therefore what the verse means, is to just place a key inside of the bread”

– Tractate Bava Gedola 12b

“On the Shabbos following Pesach, one must make a challah either in the shape of a key, or with a key placed inside. Men of faith will follow both opinions, and make a challah in the shape of a key with a key on the inside.

– Machmanodies Sefer Hamitzvos

Ok, as you can clearly see the meforshim talk about shlissel challah, and actually there’s a Shita M’Fursemmes that discusses the Machmanodies, and compares it to mezuza (how going l’fi two da’os is actually going like neither), but we don’t have time for that.

Annnnyway, enough leytzanus (and apologies to whoever is still reading and has no idea what just happened)…let’s talk about challah.

IMG_2881.jpg

As I’m sure you no doubt remember, we’ve covered challah before, but I’m here to tell you, I’ve uncovered the key to making challah, want to hear what it is?? Get a scale.

Maybe you’ve heard this diatribe a few million times whilst here in this weblog, the whole scale thing, and I’m fairly certain I’ve convinced a grand total of -4 people to buy a scale (yes, that means 4 people returned theirs…probably out of spite…you spiteful bunch), but seriously, what if I could give you a master formula that can be scaled up and down as needed to make challah? Well guess what fellow internerds, I’ve got you covered. So get a freakin scale already, like f’realzies.

Ok so here’s the master ratio for Challah, taken once again by Peter Reinhart’s book Crust and Crumb:

flour 100%
water 38%
eggs 21%
oil 6.25
sugar 12.5
salt 1.6
yeast 1.4

So we’ve spoken about baker’s percentages before, but to reiterate, here’s the general gist: all amounts are in proportion to the flour present, so the amount of flour is always denoted as 100%, and then all of the other percentages are the percent of that specific thing, in relation to the flour. So if you had 100 grams of flour, then you would need 38 grams of water, 21g of eggs, 6.25g of oil, and so on. I think you can see here why a scale makes this so much easier. All you need is one constant, so say you have 4 eggs, and want to make challah with that, well 4 eggs usually is in the 200 grams range (@ 50g per large egg), well from there we know, you would need 952 grams of flour, 361 grams of water, 60g of oil, and so on.

wpid-wp-1429120290932.jpeg
my worksheet…this is how we do baking in the fogel house


Now these numbers are fairly constant, but say you wanted to add more yolks (say you wanted a yellower challah, or wanted to boost the shelf life by increasing amount of fat and emulsification, etc…)  well keep the 21% but adjust it to include yolks. Want to do some coconut oil with the oil (you know, because coconut oil is a saturated fat, which will lend more structure, and more flavor), same idea…keep the % the same, but adjust as needed. Want to make your challah with beer instead of water??? Well that probably means you have a problem , but hey I’d join you in that most wonderful problem! [and no, the alcohol, doesn’t get “fully cooked off”…and yes, it might affect the gluten formation because of the alcohol, but don’t you bust my bubble!] The options are limitless.

wpid-wp-1429120288828.jpeg
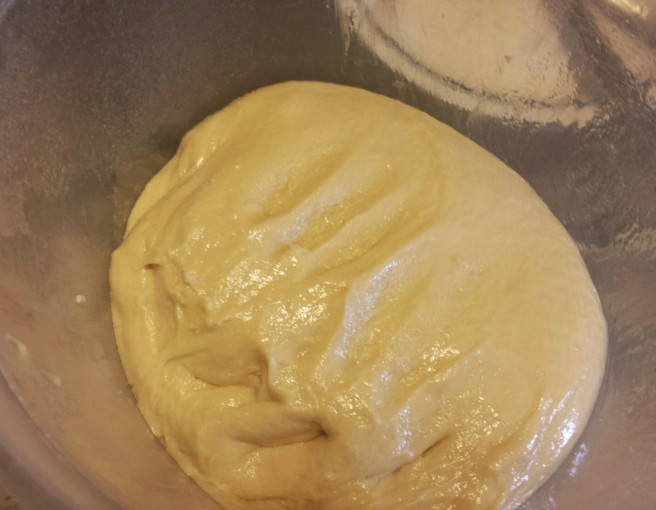
look at that beautiful dough

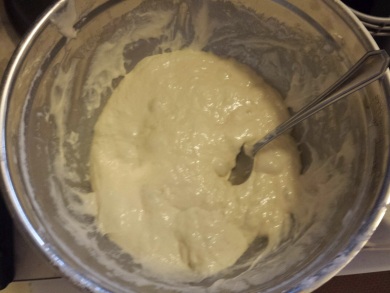
Oh and one last thing, pretty much whenever I make bread, and I have the time, I like to “ferment” my dough. Now terminology aside, what I mean by that is, basically allowing the dough to rise verrrry slowly, so the yeast, flour, and enzymes have time to develop stuff (basically flavors, but also it affects the quality of the dough, brings out certain sugars, enhances browning, enhances gluten formation…that sorta stuff), the way we do that is to have the dough rise in the fridge. Now you can do that one of a few ways, the easiest way to do that is combine all your ingredients, and after kneading, place in the fridge to rise for up to 4 days (punching down and redistributing the gases every once in a while). Another way to do this is by making a poolish or a biga. Those are both pretty similar things, and what you do essentially is combine some flour and water (You want more water than flour, so in the order of 100-120% water [actually the difference between a biga and a poolish are the amounts of water, but I digress]) mix until combined, and let it sit in the fridge for up to 4 days (again, mixing every once in a while). Once you have your poolish/biga thingamabob, you then add it together with the rest of your dough, and complete the challah making process (obviously accounting for the amounts of water/flour in the biga).

Biga/Poolish pardon the horrendous quality of the picture
Biga/Poolish
pardon the horrendous quality of the picture

Now we didn’t even discuss kneading, and forming dough, but we’ll leave that for the next time I decide to write about dough.

So there you have it! As a God fearing individual, I assume you will take it upon yourself to be m’kayim this mitzvas asey shel z’man grama of shlissel challah (oh and by the way, there are some shitas that say you can’t be yotzey if your wife makes it because she’s patur from this mitzva)

Preserved Esrog

wpid-wp-1424198931493.jpeg

People of the world, I am still alive! Let’s make preserved esrogim!

So, what’s a preserved esrog? Well, it’s like a preserved lemon, only with another citrus, namely – an esrog, aka – a citron. What’s preserved lemon you ask?? Well, the general gist of a preserved lemon is: you take a bunch of lemons, cut them up (whether in pieces, or only partially seems to be up for debate), bury it in salt, watch as the lemon juices and salt form a sort of brine, and voila, you have “preserved lemons,” this tart (possibly sweet, if sugar is added also), salty, briny thingy, that can be used in many sort of savory applications. And me thinks – hey why not preserve some esrog, so that’s what I did….The end…Good night everyone!

Ha! Sorry to say, but 2015 is not the year I work on my verbal diarrhea…moving-right-along.

First off, you might be asking yourself, nossi does realize that sukkos was like 5 months ago right? Surely even he realizes that even if I did decide to save my esrog, that by this time it would be, how you say, unusable? 

Well Mr Italics-pants, I do know all that, but you see I suffer from this thing called procrastination. It’s crippling; plus work, and stuff, so like whatever man. Just bookmark this post, and let’s get back to it sukkos time, ok?? Geez, do I have to do everything around here?? I would even say that I’ll remind you come next sukkos, so you save your esrog…but you and I know both know by now, that’s not gonna happen, because, well, see above…

Ok, so moving along, here’s an amazing fun fact for you brave souls still reading – the esrog/citron is one of the 3 original citrus fruits (the other 2 being mandarins, and the pomello…all other citrus fruits are some sort of hybridized/cultivated mutant).

So preserved esrog (or lemons, if you for some odd reason don’t have esrogim sitting around) as I said earlier is this sort of condiment/spice that is used to add a tart, saline, citrusy flavor to a dish, most notably it goes well with chicken.

As I mentioned above, the traditional way to preserve lemons is to bury cut up lemons in salt, which draws the moisture out of the lemon, and then salt and moisture mix, forming this brine solution.

Now this process is similar to any preservation technique, be it pickles (such as spicy pickled okra), or corned beef, the idea behind it all is to kill off bad bacteria, so good bacteria can take over and do it’s thing (enhance flavor/texture/shelf life…). We talked about the difference between “fermenting” and “pickling” back in the post on okra, so if you want we’ll all wait for you to catch up…go on…

The traditional approach to preserving lemons is more of a fermentation process, where just salt is added, which takes longer, and relies a little more on proper proportions (ratio of salt:water), but will have a more fermented taste (this process is sometimes referred to as “lacto-fermented”), but I decided to try and do a quick “refrigerator pickle” for the esrogim to preserve them. This process (which again is in the okra post) basically relies on vinegar to do the majority of the leg work in reducing bad bacteria, and kinda allows the good bacteria to flourish.

I cut up the esrogim, and discarded the interior (the pulp), and was left with the peel and rind. Now in most citrus fruits, the rind is too bitter, and we generally don’t want it, but in esrogim, it’s really the only useful part, but obviously can’t be eaten raw.

To add flavor I decided to take my dried up hadassim leaves (myrtle branch, also used on sukkos), along with salt and suger (about 1 tablespoon each), and added hot water to dissolve salt/suger, and to re-hydrate the hadassim. Then I added the vinegar, and submerged it all, and placed it in the fridge. The final proportion of vinegar:water should be about 50:50 or even 60:40.

Now I’ve never actually tried this with lemons, and never really made preserved lemons, I don’t see why wouldn’t work…but I ain’t no rocket surgeon, so let me know how it goes!

So now that you read all through that, you probably want to know what I did with it, right?

wpid-wp-1424198923956.jpeg

I decided since preserved lemon apparently goes well with chicken, me thinks why not try this with chicken, I’m sort of a genius like that. Anyway, I threw some of the preserved esrog, along with shallots, onions, garlic, and home made chili paste (ie – s’chug), which shocker of all shockers, I made way back in the summer (with a litany of beautiful hot peppers from this CSA I was a part of) that I never posted…it’s kinda my MO, so deal with it!

I blended it all together

wpid-wp-1424198921033.jpeg

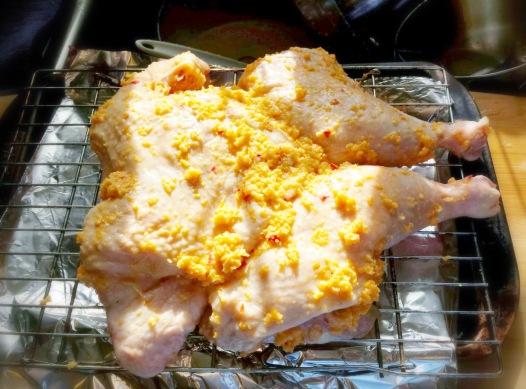
and slathered it all over a chicken that I had spatch-cocked (best food word ever…it basically means to butterfly a chicken, by removing the backbone, and opening it up like a book..).

wpid-wp-1424198933577.jpeg wpid-wp-1424198923911.jpeg

Then I roasted the whole shebangbang, and to prevent the breast from overcooking, which it is wont to do, I covered the breast part with silver foil for the first hour or so

wpid-wp-1424198923233.jpeg


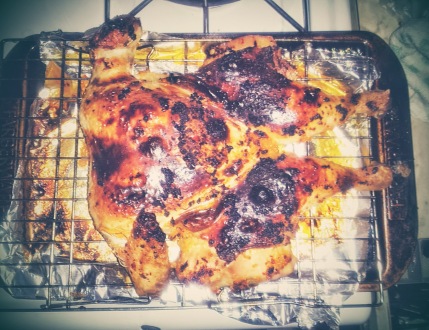
then I uncovered the breast, and cranked the oven up to about 450-500 for another 25-30 minutes to crisp the skin

wpid-wp-1424198934220.jpeg

That’s it boychick’ll…see you in 2016!

Matzah Balls

DSC_0715

All right, so it’s that time of the month when I come out of hiding to contribute to the kosher food blogging world, in this month’s version of the Kosher Connection- Link up. If you’re new to the program, every month there’s a theme, and a bunch of reputable food bloggers, and myself, get together to give their version of that theme. This month’s theme is “Get well Gil.” For the uninitiated, Gil Marks is one of the foremost experts on kosher food, and it’s long history. In fact he even wrote a freaking encyclopedia on it! I happen to love the book, and it only weighs in at a whopping 650ish pages, so you know, it’s typical light reading fare. But in all honesty, the book is incredible, and it literally covers everything imaginable related to kosher food, from Adafina to Zwetschgenkuchen (“a cross between a cake and tart made with Italian prune plums”), I highly recommend taking a gander.

Anyway, I was trying to think what would be an appropriate recipe, and it dawned on me – Matzah Balls! Think about it – it’s the ultimate healing food, plus, it’s one of those foods that epitomizes Jewish cooking (sorry S’fardim, I guess you don’t count!…I joke, next time I’ll make Jachnun, or something scary sounding like that). Onward!

Quoting Gil in the Encyclopedia:

“..By the 12th century, the concept of dumplings, originally made from bread, had spread from Italy to Bohemia, where it was called knodel (knot). From there, the name traveled with variations in pronunciation, to southern Germany, Austria, and France. The term also traveled eastward to the Slavic regions. The most widespread Ashkenazic name for dumpling became knaidel/kneydl, which is better know by the plural knaidlach/kneydlakh

As the medieval period waned, flour began to replace bread as the base…During the 8 days of Passover…Germans discovered that they could substitute matza for the bread or flour, creating the most widely known type..matzah knaidel

It was only in the early 20th century, after Manischewitz introduced packaged matza meal, that this dumpling achieved mass popularization and it’s current status as an iconic Jewish food.

Matza balls consist of only a few ingredients – matza meal, eggs, a little far, a liquid, salt, and pepper. Using matza meal in place of flour, and adding eggs resulsts in a lighter dumpling. Adding fat…produces a more flavorful dumplings…

Now, ever since our post on chicken stock, I’m sure that like me, you also have some chicken shmaltz lying around in the fridge (or maybe some duck fat??), and seriously, what better way than to incorporate it into some matzah meal, with some of that stock…it’s like the circle of life, man. First you make chicken, then with the leftover bones and scraps, you make stock. With that stock you get the base of your chicken soup, and you also have shmaltz to make knaydlach….it’s so deep man.

DSC_0689

I actually used Michael Ruhlman’s recipe for this (I like that everything is by weight…because, you know… a scale…I’m like a broken record over here…), and I took some matzah, and added it to a food processor to pulverize.

DSC_0691

To that I added, the remaining dry ingredients: baking powder, some fresh rosemary (which I had lying around, but you can use whatever you see fit), salt, and black pepper.

DSC_0693

DSC_0692

I melted some fresh chicken fat (you can use vegetable oil if you’re a lightweight), added it to 4 eggs and 1/4 cup of fresh chicken stock, and mixed it all together.

DSC_0687DSC_0688

Then I mixed together, the dry and wet ingredients, and after thoroughly combined, I let it sit in the fridge for at least 30 minutes, to fully hydrate.

DSC_0696


DSC_0700

Before you’re ready to go, bring a pot of salted water to a simmer.

Then I rolled it up into golf-ish sized balls (remember, they’re going to grow, so smaller than you expect….I make this mistake, every time mind you).

Dump the kneydels into the salted water, and cook until they’re nice and fluffy,  about 20-30 minutes.

DSC_0719

And there you have it…there might be some of you out there (ahem – Phoenix Fresser..) why not just make this out of a box mix?? Well I’m going to preempt that by saying, Hashem gets angry when you use a box mix (especially duncan hines…but that’s another post).

Anyway, we here at the Kosher Gastronome Headquarters would like to wish a full and speedy recovery to Gil (Yitzchak Simcha ben Baila).

As always with the Kosher Link Ups, click on the funny frog guy below to see what the other peoples are doing.

Matzah Balls:

Ingredients:

  • 4 squares of matzo (ie –  1 cup/140 grams matzo meal), well pulverized in a food processor
  • 4 eggs, beaten
  • 1/4 cup/60 grams schmaltz, melted (or vegetable oil)
  • 1/4 cup/60 milliliters chicken stock or water
  • 1 teaspoon baking powder
  • 1/8 teaspoon chopped rosemary (optional)
  • 1 teaspoon salt
  • 1/2 teaspoon ground black pepper

Directions:

  1. Combine all the ingredients in a bowl and stir until they are all thoroughly mixed. Cover with plastic wrap and set aside in the fridge for at least 30 minutes.
  2. With damp hands, form the matzo mixture into 8 golf ball-sized orbs (they will double in size).
  3. Bring a pot of salted water to a simmer
  4. Drop in balls, and cook for 20-30 minutes.